

How to Set up your Work Vise on a CNC Machine

How to Set Up Vise on Cnc Machine
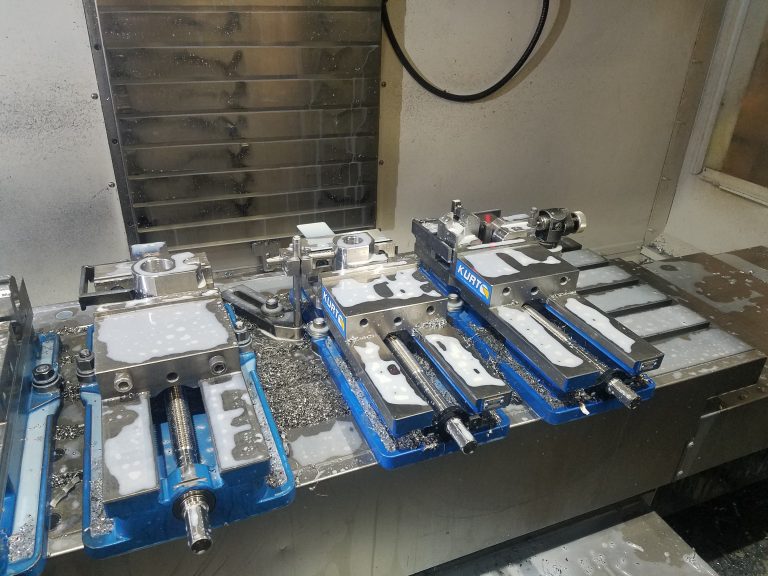
If you want to machine precision products, you have to use a precision process. To machine parts that are within the tolerance specifications of the print, it is imperative that the vise you use in a computer numerical control, CNC machining center be placed perfectly straight. If there are metal chips under the vise or the vise is in any way crooked, you will have greater difficulty in in producing parts within the tolerances specified and you may end up wasting valuable raw material and valuable time. CNC machining is a precision process. If you have purchased or are running a cnc machine, you have expectations of high precision production. To achieve those expectations you must start by setting the CNC machine up correctly.
Instructions
Step 1
Clean the cnc machine’s worktable thoroughly by first blowing it off with compressed air, making sure to remove any chips from previous operations. A single tiny chip can cause the vise to be off by a fraction of an inch. This small amount can cause parts to be incorrect after cnc machining.
Step 2
Pour lubricant such as oil on the table. Use a fine-grit sanding stone to remove any debris that may be impossible to remove with air only. Rust and dirt can build up on the table, making it difficult to ensure a straight vise for accurate, precision CNC machining.
Step 3
Clean the bottom of the vise thoroughly. Use the same fine grit sanding stone with a little oil to rid the bottom of the vise of metal chips and rust. You want the bottom of the vise to be perfectly clean like the table for the best measurements from the finished parts.
Step 4
Slide two T-bolts into the T-slots located on the table. This will allow you to tightly secure the vise to the table and will prevent the vise from slipping during machining. You want the vise to be well within the spindles area of travel, but closest to the tool turret for maximum efficiency.
Step 5
Place the vise on the table in between the two T-bolts. Push the T-bolts into the corresponding areas on each side of the vise.
Step 6
Tighten the nuts located on the tops of the T-bolts until they are moderately tight, you will need to make sure the vise is perfectly straight before completely tightening it. Do not over-tighten; at this point, the vise may not be straight.
Step 7
Attach a dial indicator to the spindle head and bring the tip of the indicator to a flat surface on the vise. Usually there is a leading edge on one of the jaws of the vise. Move the dial indicator along the x axis, which would be left to right facing it, and make sure that the needle does not move. If it does, lightly tap the vise on the side that is out until the vise is perfectly straight.
Step 8